


If you often have to send out certain books or sheets by e-mail, then you should have noticed that this procedure cannot be called fast. If you do it “classically”, then you need:
- open an email program (for example, Outlook)
- create a new message
- type in the address, subject and text
- attach a file to the message (don’t forget!)
- pịa bọtịnụ Send
In fact, mail can be easily sent directly from Excel in a bunch of different ways. Go…
Method 1: Embedded Send
If you still have the good old Excel 2003, then everything is simple. Open the desired book/sheet and select from the menu File – Send – Message (File — Send To — Mail Recipient). A window will open in which you can choose one of two options for sending:
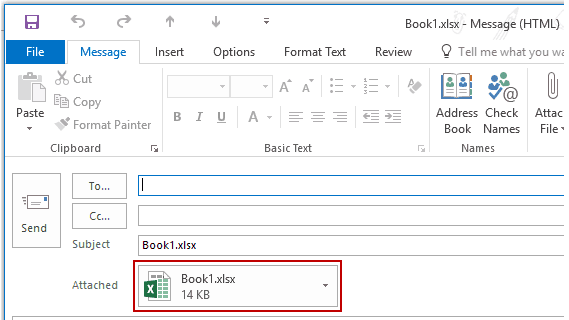
In the first case, the current book will be added to the message as an attachment, in the second case, the contents of the current sheet will go directly into the message text as a text table (without formulas).
In addition, the menu File – Submit (File — Send To) there are a few more exotic shipping options:
- Message (for review) (Mail Recipient for Review) – the entire workbook is sent and at the same time change tracking is turned on for it, i.e. begins to be clearly fixed – who, when and in what cells made what changes. You can then display the changes made in the menu Service – Fixes – Highlight fixes (Tools — Track changes — Highlight changes) ma ọ bụ na tab Review – Corrections (Reveiw — Track Changes) Ọ ga - ele ihe dị ka nke a:
Colored frames mark changes made to the document (each user has a different color). When you hover the mouse, a note-like window pops up with a detailed description of who, what and when changed in this cell. It is very convenient for reviewing documents, when, for example, you edit the report of your subordinates or the boss edits yours.
- Along the route (Routing Recipient) – the message where your book will be attached will go through a chain of recipients, each of which will automatically forward it further, like a baton. If desired, you can set the message to return to you at the end of the chain. You can enable change tracking to see the edits made by each person in the thread.
In the new Excel 2007/2010, the situation is slightly different. In these versions, to send the book by mail, you need to select the button Office (Office Button) ma ọ bụ tab File (File) na otu Send (Send). Next, the user is offered a set of sending options:
Please note that in new versions, the ability to send a separate sheet of the workbook inserted into the body of the letter has disappeared – as it was in Excel 2003 and later. The only option left is to send the entire file. But there was a useful opportunity to send in the well-known PDF format and the less well-known XPS (similar to PDF, but does not require Acrobat Reader to read – it opens directly in Internet Explorer). The command to send a book for review can be pulled out as an additional button on the quick access panel via File – Options – Quick Access Toolbar – All Commands – Send for Review (File — Options — Quick Access Toolbar — All Comands — Send for Review).
Method 2. Simple macros to send
Sending a macro is much easier. Opening the Visual Basic Editor via the Menu Ọrụ – Macro – Visual Basic Editor (Ngwaọrụ — Macro — Visual Basic Editor), insert the new module into the menu Fanye – Modul ma detuo ederede nke macro abụọ a ebe ahụ:
Sub SendWorkbook() ActiveWorkbook.SendMail Recipients:="[email protected]", Subject:="Лови файлик" End Sub Sub SendSheet() ThisWorkbook.Sheets("Лист1").Copy With ActiveWorkbook .SendMail Recipients:="[email protected]", Subject:="Catch the file" .Close SaveChanges:=False End With End Sub After that, the copied macros can be run in the menu Ọrụ – Macro – Macros (Ngwaọrụ - Macro - Macros). SendWorkbook sends the entire current book to the specified address, and SendSheet — Sheet1 as an attachment.
When you run the macro, Excel will contact Outlook, which will cause the following security message to appear on the screen:
Wait until the button dozie becomes active and click it to confirm your submission. After that, automatically generated messages will be placed in the folder Ọpụpụ and will be sent to recipients the first time you start Outlook or, if you have it running, right away.
Method 3. Universal macro
And if you want to send not the current book, but any other file? And the text of the message would also be nice to set! The previous macros will not help here, as they are limited by the capabilities of Excel itself, but you can create a macro that will manage Outlook from Excel – create and fill in a new message window and send it. The macro looks like this:
Sub SendMail() Dim OutApp As Object Dim OutMail As Object Dim cell As Range Application.ScreenUpdating = False Set OutApp = CreateObject("Outlook.Application") 'start Outlook in hidden mode OutApp.Session.Logon On Error GoTo cleanup 'if not started - exit Set OutMail = OutApp.CreateItem(0) 'create a new message On Error Resume Next 'fill in the message fields With OutMail .To = Range("A1").Value .Subject = Range("A2").Value .Body = Range("A3").Value .Attachments.Add Range("A4").Value 'Send can be replaced with Display to view the message before sending .Send End With On Error GoTo 0 Set OutMail = Nothing cleanup: Set OutApp = Nothing Application.ScreenUpdating = True End Sub The address, subject, text of the message and the path to the attached file must be in cells A1:A4 of the current sheet.
- Group Mailing from Excel with the PLEX Add-in
- Macros for sending mail from Excel via Lotus Notes by Dennis Wallentin
- Kedu ihe bụ macros, ebe itinye koodu nnukwu na Visual Basic
- Ịmepụta ozi-e nwere ọrụ HYPERLINK